The Garlic Table:
Recipes for Every Craving

Explore Garlic Shop Recipes
Wholesome Recipes with
a Garlic Punch
Ingredients:
Almonds, Black Garlic, Bread, Butter, Fennel, Honey, Lemon, Olive Oil, Parsley, Ricotta
Description:
A bright Tuscan starter combining sweet caramelized black garlic ricotta, candied fennel and crisp toasted bread; a Garlic Shop favorite that balances smoky-sweet, citrusy and crunchy textures for an elegant, garlic-forward vegetarian bite.
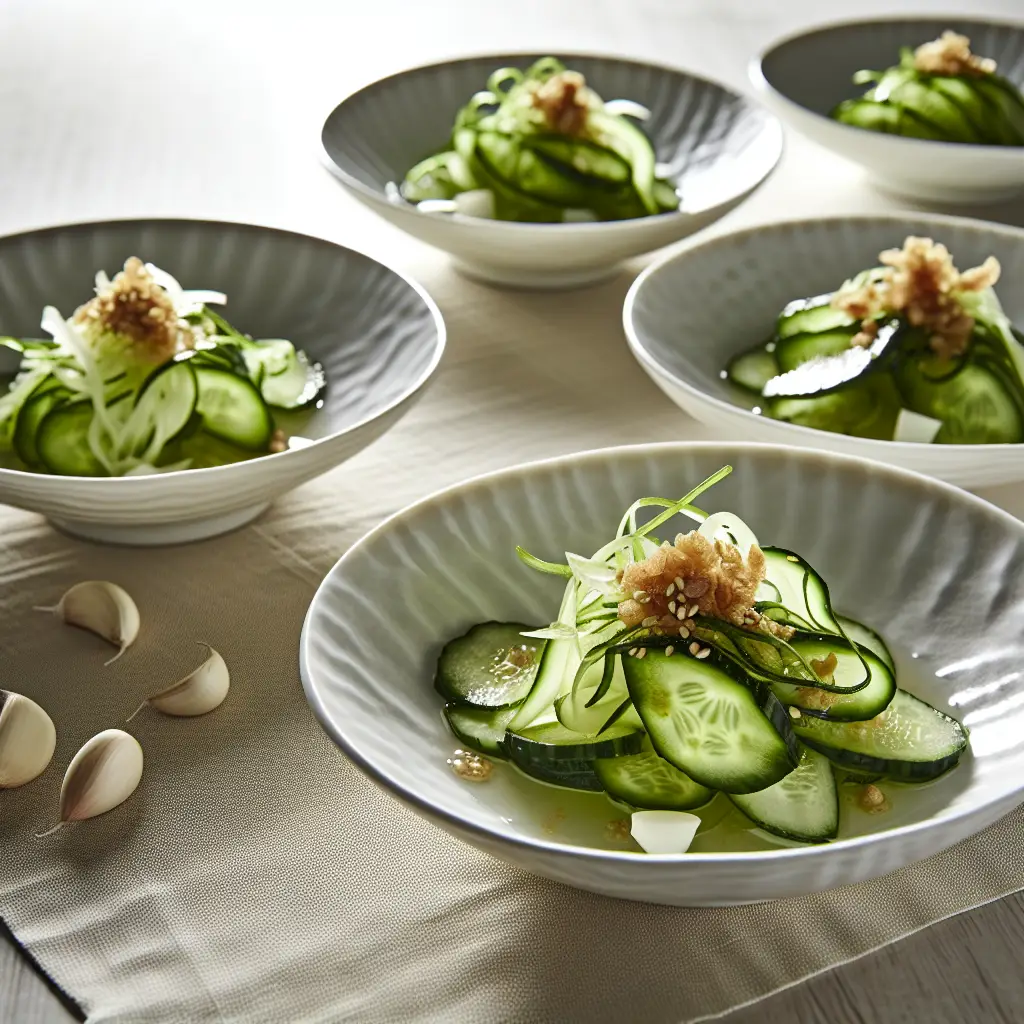
Crisp Myoga & Garlic Sunomono with Shiso
Ingredients:
Instructions:
1. Prepare the Vegetables
Wash the cucumbers and slice them paper-thin (use a mandoline if you have one); thinly slice the myoga, garlic and shiso leaves.
2. Make the Pickling Liquid
In a small bowl combine rice vinegar, yuzu (or lemon) juice, sugar, salt and a tiny drizzle of sesame oil if using; stir until the sugar and salt dissolve.
3. Salt and Press
Toss cucumber and myoga with the salt and let sit 5–10 minutes to draw out moisture; gently press or pat dry with kitchen paper to remove excess liquid.
4. Marinate
Combine the vegetables with the pickling liquid, add thinly sliced garlic and shiso, toss gently and sprinkle toasted sesame seeds over the top; refrigerate for at least 20 minutes (longer for deeper flavor).
5. Serve
Plate chilled in a shallow dish, finish with a light dusting of shichimi if desired and an extra scatter of sesame seeds; serve as a crisp, garlicky side with grilled fish, rice or as part of a bento.
A bright Japanese sunomono combining thinly sliced cucumber and myoga with punchy garlic, shiso and a rice-vinegar sugar brine — a light, garlicky side from Garlic Shop that brightens any meal.
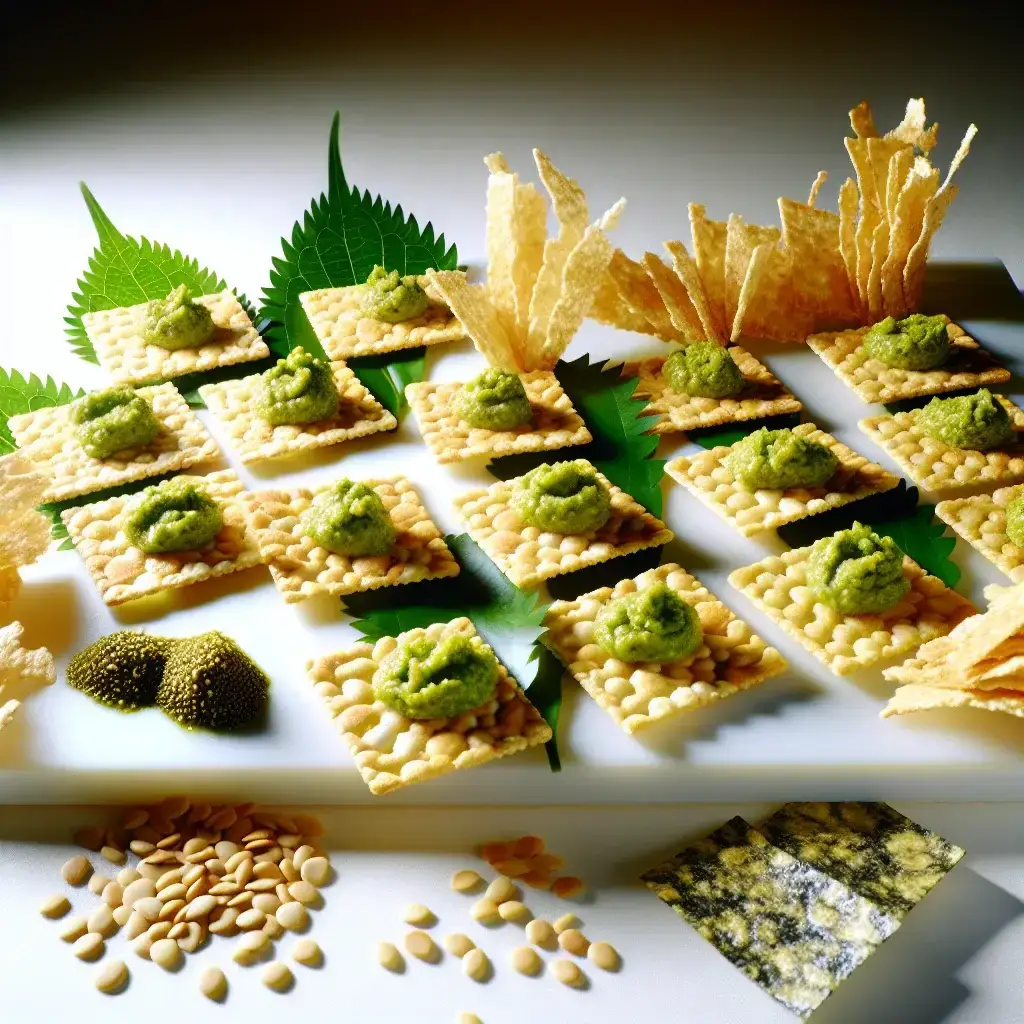
Shiso & Garlic Arare — Crispy Shiso‑Garlic Rice Cracker Bites
Ingredients:
Instructions:
1. Make the shiso‑garlic pesto
In a small food processor or with a mortar and pestle, combine shiso leaves, garlic, toasted sesame seeds, yuzu zest, rice vinegar and salt; pulse while drizzling in the oil until you reach a coarse, spreadable paste — scrape down the bowl once to keep the texture bright and slightly chunky.
2. Taste and adjust
Sample the pesto and add a little more salt, a few drops of rice vinegar, or a touch more oil if it feels too thick — the garlic should be present but not overpowering the shiso brightness.
3. Prepare the bases
Arrange the arare (rice crackers) on a serving platter. If your senbei are large or very hard, optionally warm them briefly in a 150°C / 300°F oven for 3–4 minutes to refresh the crunch.
4. Top the crackers
Using a small spoon or knife, dollop about 1/2 teaspoon of shiso‑garlic pesto onto each cracker; press a small piece of toasted nori on top of some for extra umami and texture contrast.
5. Garnish and finish
Sprinkle extra toasted sesame seeds and finely sliced shiso over the finished crackers. If you like heat, dust lightly with shichimi togarashi. Serve immediately with lemon or yuzu wedges to squeeze just before eating.
6. Serving notes & storage
Best served the day of assembly for optimum crunch. Store leftover pesto refrigerated in an airtight jar for up to 4 days; re‑apply to freshly warmed rice crackers to revive the texture.
A playful Japanese starter from Garlic Shop: crunchy arare rice crackers crowned with a shiso‑garlic pesto, toasted sesame and nori. Herbaceous shiso and bold garlic meet citrusy yuzu for a quick, addictive bite.
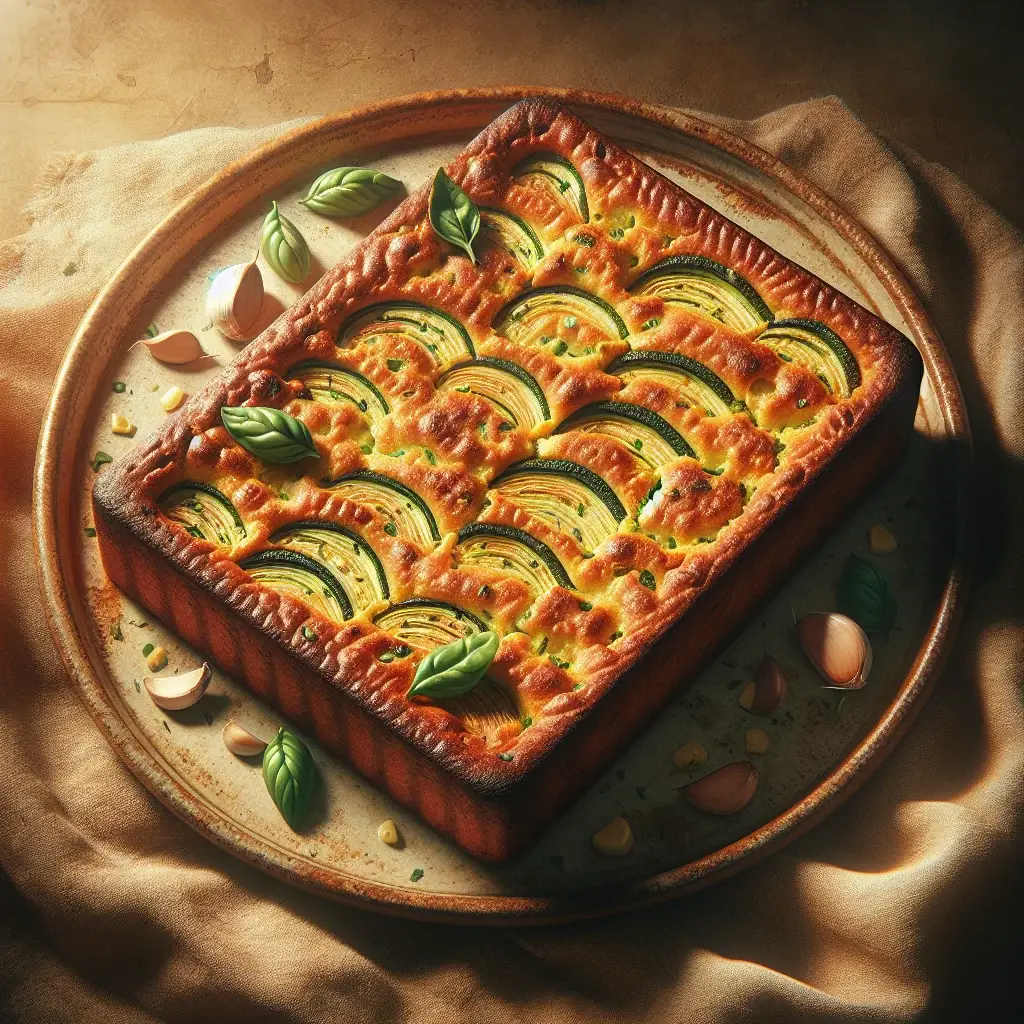
Tuscan Sunset Garlic Scarpaccia
Ingredients:
Instructions:
1. Prepare the Zucchini
Grate the zucchini using a box grater or food processor. Place the grated zucchini in a colander and sprinkle with a pinch of salt. Let it sit for 10-15 minutes to draw out excess water. Squeeze out as much liquid as possible from the zucchini using your hands or a clean kitchen towel.
2. Combine Wet Ingredients
In a large bowl, whisk together the beaten eggs, olive oil, and water (or milk.)
3. Combine Dry Ingredients
In a separate bowl, combine the flour, sugar, and salt.
4. Mix Batter
Gradually add the dry ingredients to the wet ingredients, whisking until a smooth batter forms. Stir in the minced garlic and the squeezed grated zucchini until well combined.
5. Bake
Preheat your oven to 375°F (190°C). Lightly grease an 8×12 inch (20×30 cm) baking dish or a round pie dish with olive oil. Pour the batter evenly into the prepared dish.
6. Bake until Golden
Bake for 30-40 minutes, or until the scarpaccia is golden brown on top and firm to the touch. A toothpick inserted into the center should come out clean.
7. Serve
Let it cool slightly before slicing and serving. Garnish with fresh chopped basil leaves, if desired. It can be served warm or at room temperature.
Discover a unique taste of Tuscany with this delightful sweet and savory zucchini and garlic cake, a surprising fusion where golden zucchini and aromatic garlic dance in perfect harmony. A truly unique garlic experience that promises to tantalize your palate.
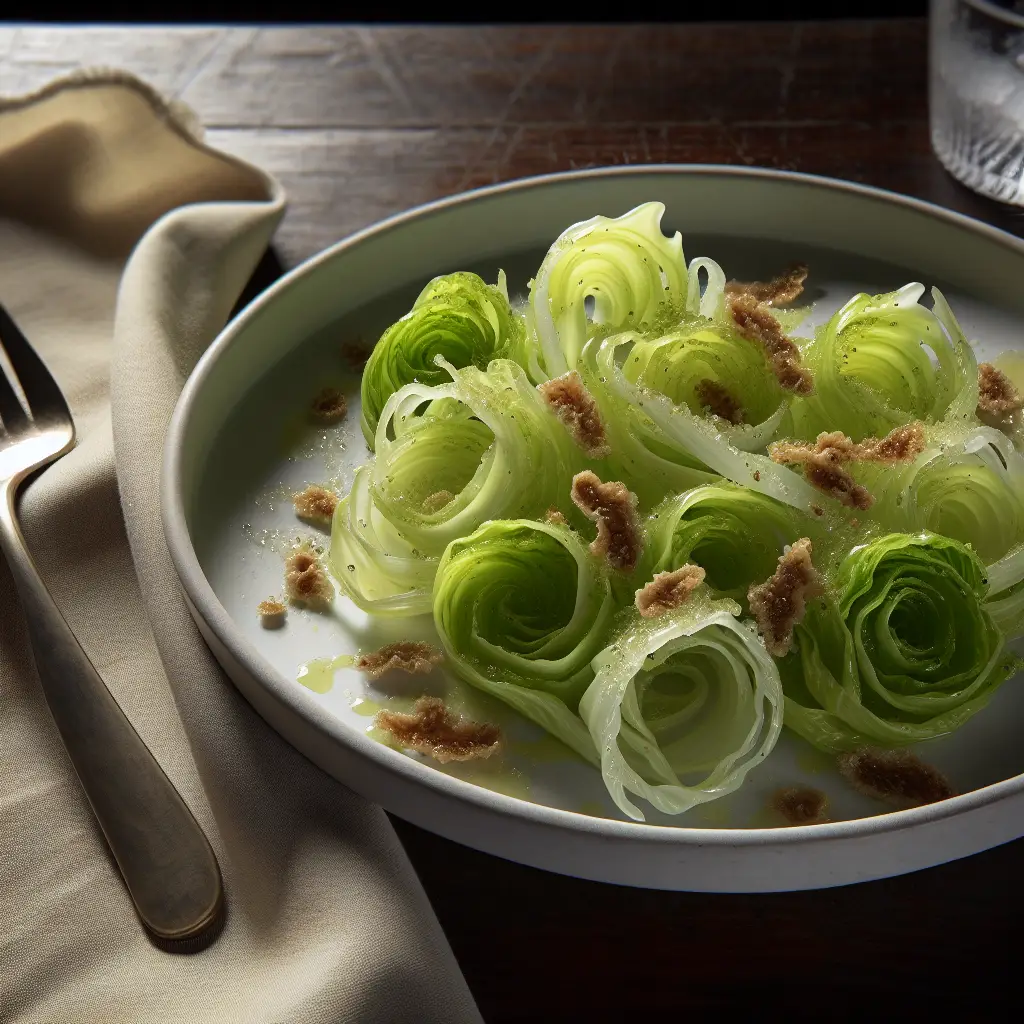
Roman Garlic Chicory Salad: Puntarelle Perfection
Ingredients:
Instructions:
1. Prepare the Puntarelle
If using traditional puntarelle, carefully separate the outer leaves and discard. Cut the inner, tender shoots (the "puntarelle") lengthwise into thin strips, about 1/4 inch wide. Immediately plunge the cut puntarelle into a bowl of ice-cold water for at least 30-60 minutes. This step is crucial for making the chicory curl and crisp up, and it also reduces some of its bitterness. If using another type of chicory, simply wash and dry well, then chop into bite-sized pieces.
2. Make the Dressing
While the chicory is soaking, prepare the dressing. In a small bowl, combine the minced garlic and mashed anchovy fillets. Using the back of a fork or a mortar and pestle, mash them together until a smooth paste forms.
3. Emulsify the Dressing
Gradually whisk in the extra virgin olive oil, then slowly add the white wine vinegar. Continue whisking until the dressing is well emulsified. Season with salt and freshly ground black pepper to taste. If desired, add a pinch of red pepper flakes for a subtle kick.
4. Assemble the Salad
Drain the puntarelle very thoroughly and pat dry with a clean kitchen towel or use a salad spinner. This ensures the dressing adheres well.
5. Serve
Place the crisp puntarelle in a serving bowl. Pour the garlic-anchovy dressing over the chicory and toss gently to coat evenly. Serve immediately as a refreshing appetizer or side dish.
Discover a crisp and zesty Italian classic, showcasing the vibrant flavor of chicory perfectly balanced with a punchy garlic and anchovy dressing. This Roman-style delight is a must-try for any garlic enthusiast and a refreshing starter!
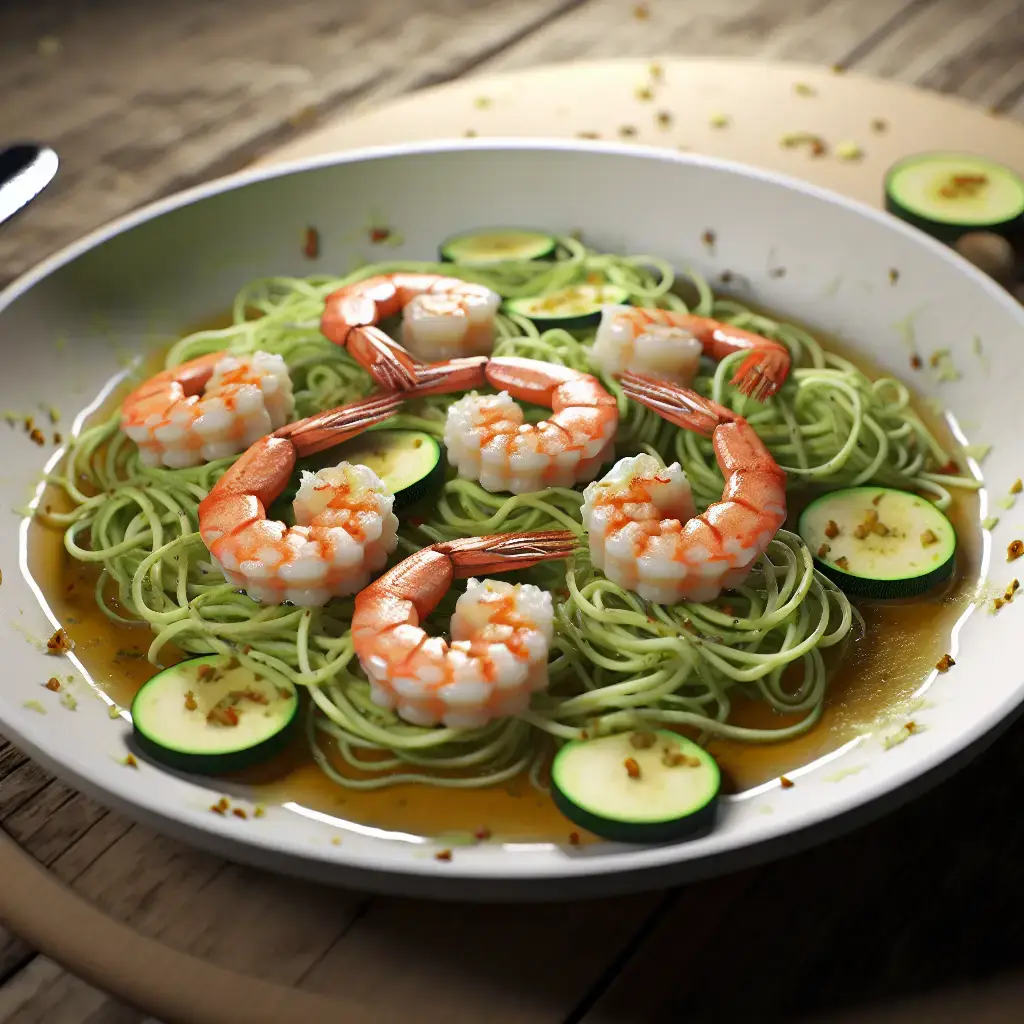
Garlic Butter Shrimp Scampi with Zucchini Noodles: A Zesty American Delight
Ingredients:
Instructions:
1. Prepare Zucchini Noodles
If you haven’t already, spiralize your zucchini into noodles. Set aside.
2. Prepare Shrimp
Pat the peeled and deveined shrimp dry with paper towels. Season lightly with salt and pepper.
3. Sauté Garlic
In a large skillet or pan, heat 2 tablespoons of olive oil over medium heat. Add the minced garlic and red pepper flakes (if using) and sauté for about 30 seconds until fragrant, being careful not to burn the garlic.
4. Cook Shrimp
Add the shrimp to the pan in a single layer. Cook for 1-2 minutes per side, until pink and opaque. Do not overcrowd the pan; cook in batches if necessary. Remove shrimp from the pan and set aside.
5. Make Sauce
In the same skillet, add the butter and let it melt. Pour in the white wine (or chicken broth) and lemon juice. Bring to a gentle simmer and cook for 1-2 minutes, scraping up any browned bits from the bottom of the pan.
6. Combine and Finish
Return the cooked shrimp to the pan with the sauce. Add the zucchini noodles and chopped parsley. Toss everything gently for 1-2 minutes, until the zucchini noodles are slightly softened but still have a bit of bite. Do not overcook the zucchini.
7. Serve
Taste and adjust seasoning if needed. Serve immediately, garnished with extra fresh parsley if desired. Enjoy with crusty bread if you like, to soak up the delicious garlicky sauce, although it’s designed to be lighter with the zucchini noodles.
Indulge in this light yet flavor-packed American classic! Succulent shrimp bathed in a rich, garlicky butter sauce, served over fresh zucchini noodles. It's a quick, healthy, and incredibly satisfying dish where garlic takes center stage, perfect for any night of the week.

Refreshing Smashed Cucumber Salad with Fiery Garlic Dressing
Ingredients:
Appetizer, Chinese Cuisine, Cold Dish, Garlic Main Ingredient, Refreshing, Side Dish, Spicy, Tangy, Vegetarian
Instructions:
1. Prepare the Cucumbers
Wash the cucumbers thoroughly. Using the flat side of a cleaver or a heavy rolling pin, firmly smash each cucumber until it breaks into irregular pieces. Don’t worry if it’s not uniform; the uneven texture helps absorb the dressing. Slice the smashed cucumber pieces into bite-sized chunks.
2. Drain Excess Water (Optional but Recommended)
Place the cucumber pieces in a colander and sprinkle with a small pinch of salt. Let them sit for 10-15 minutes to draw out excess water. This step helps keep the salad crisp and prevents the dressing from becoming diluted. Pat dry with paper towels before proceeding.
3. Make the Dressing
In a small bowl, combine the minced garlic, light soy sauce, Chinese black vinegar, sesame oil, granulated sugar, and chili oil. Whisk well until the sugar dissolves. Taste and adjust seasonings as needed; you might want more sugar for balance, or more chili oil for heat.
4. Combine and Serve
Add the cucumber pieces to a mixing bowl. Pour the prepared garlic dressing over the cucumbers. Toss gently to ensure all pieces are well coated.
5. Garnish and Enjoy
Transfer the salad to a serving dish. Garnish with chopped fresh cilantro or green onions, if using. Serve immediately as a refreshing appetizer or side dish.
Discover a vibrant and incredibly refreshing Chinese salad that perfectly balances crisp cucumber with an explosive, aromatic garlic dressing. This quick and easy dish is a garlic lover's dream, offering a delightful crunch and a spicy, tangy kick that awakens the palate.