The Garlic Table:
Recipes for Every Craving

Explore Garlic Shop Recipes
Wholesome Recipes with
a Garlic Punch
Ingredients:
Butter, Caraway Seeds, Cheese, Egg, Egg Yolks, Flour, Garlic, Milk, Salt, Sesame Seeds, Sugar, Yeast
Description:
A yeasted, flaky scone, perfect for tearing apart. These aren't your average biscuits. We're talking soft, yeasted dough, laminated with a potent garlic-butter filling and sharp cheese, then baked into golden, fluffy squares. A true garlic lover's dream, straight from the heart of Slovakia, perfect for any celebration or simply as a savory treat.
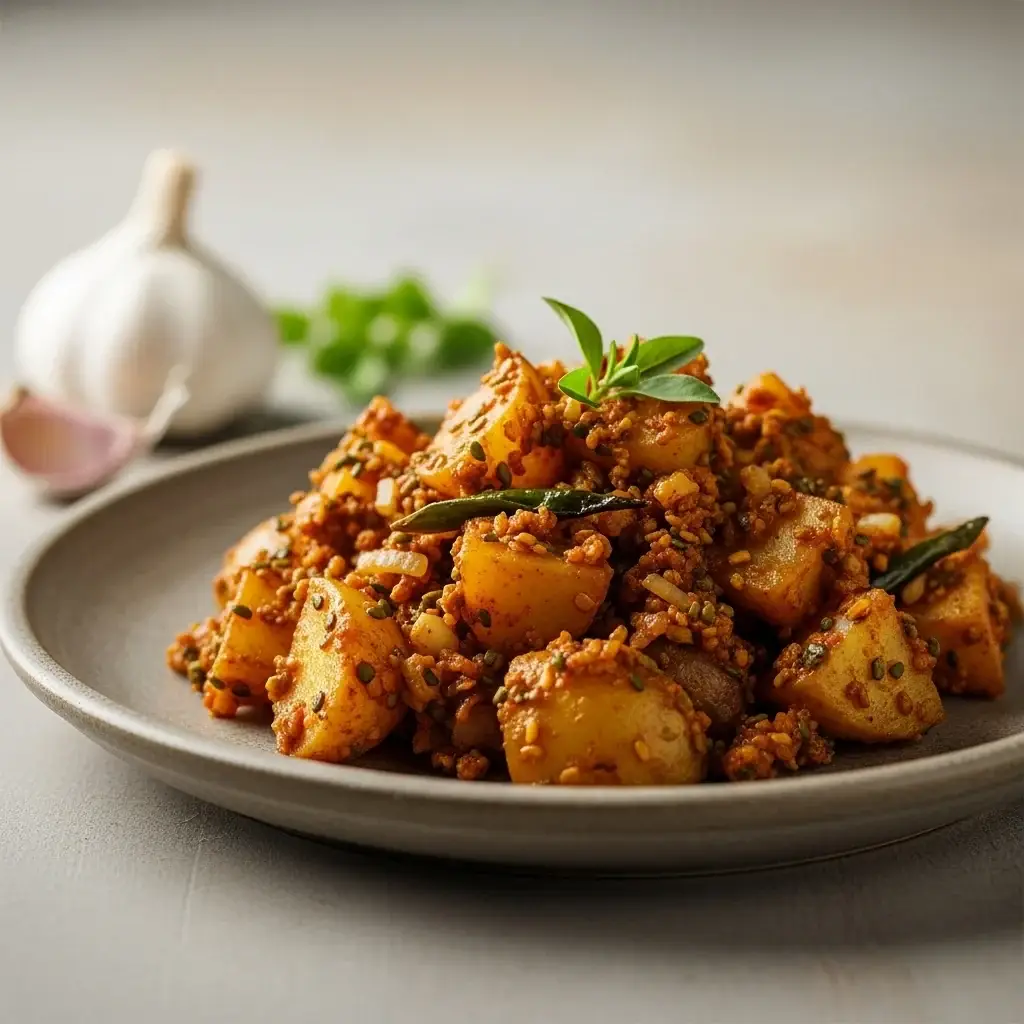
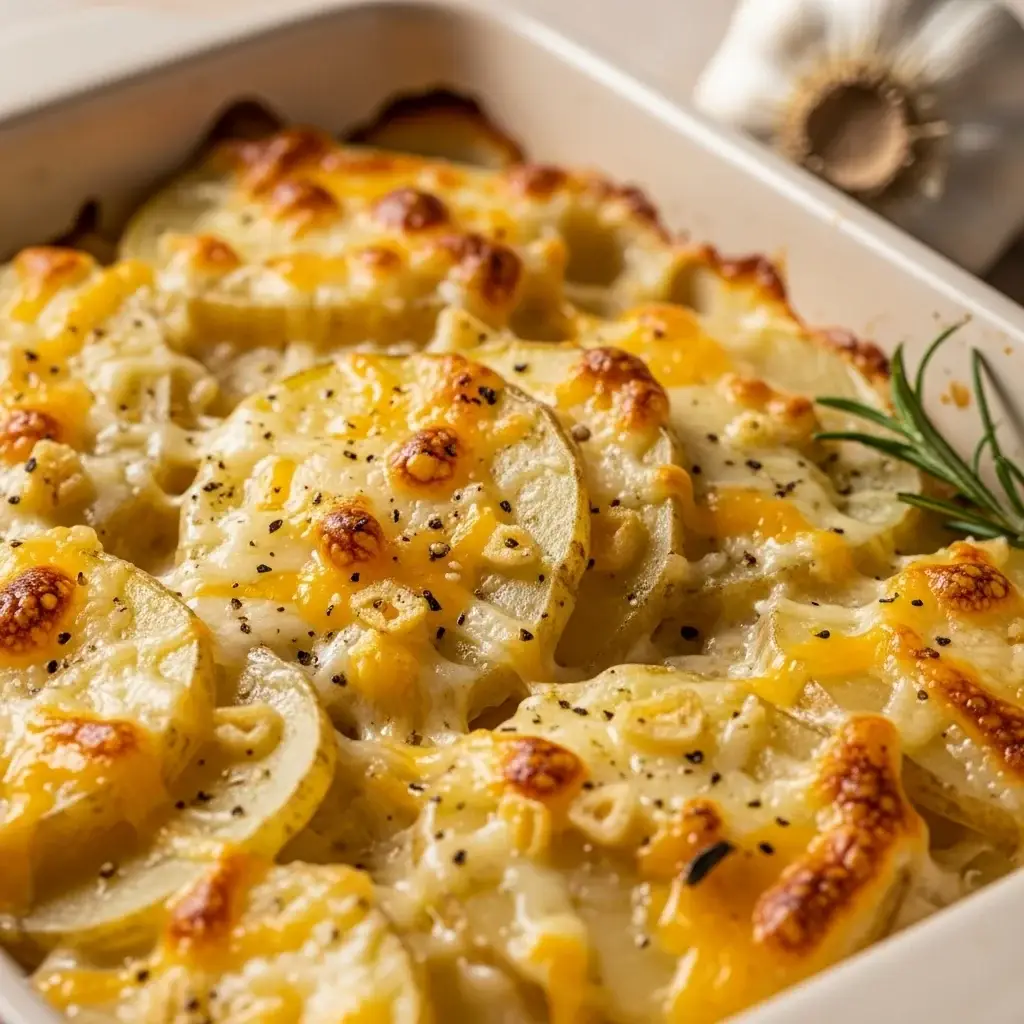
From a North Indian Kitchen: Garlicky Potato & Fenugreek Stir-Fry (Lahsuni Aloo Methi)
Ingredients:
Fenugreek, Garlic, Gluten-Free, Indian, Main Course, North Indian, Potato, Side Dish, Spicy, Stir-Fry, Vegan, Vegetarian
Instructions:
1. Prep the Greens
Pluck the fenugreek (methi) leaves from the stems. Wash them thoroughly in a large pot of water and drain completely in a colander. For a less bitter taste, you can sprinkle the leaves with salt, let them sit for 15 minutes, and then squeeze out the excess water before using.
2. Sauté the Aromatics
Heat oil in a pan over medium heat. Once hot, add the cumin seeds and let them crackle. Add the chopped garlic and sauté for about a minute until fragrant.
3. Cook the Potatoes
Add the chopped onions and green chilies, and sauté until the onions become translucent. Add the potato cubes, turmeric powder, coriander powder, and red chili powder. Mix well and sauté for 4-5 minutes until the potatoes are lightly browned.
4. Combine and Cook
Add a few tablespoons of water, cover the pan, and let the potatoes cook on low heat for 15-20 minutes, or until they are tender, stirring occasionally.
5. Add the Greens
Once the potatoes are cooked, add the chopped fenugreek leaves and salt. Stir well and cook for another 5-7 minutes, uncovered, until the leaves have wilted and the moisture has evaporated.
6. Finishing Touches
Finish the dish by stirring in the amchoor (dry mango powder) and garam masala powder. Mix everything well.
7. Serve
Serve the Lahsuni Aloo Methi hot with fresh roti, paratha, or as a side dish with dal and rice.
Discover a classic North Indian stir-fry where humble potatoes and earthy fenugreek are brought to life with a generous dose of garlic. This quick, fragrant, and healthy dish from the heart of India is perfect as a hearty side or a light main, showcasing how garlic can transform simple ingredients into something spectacular.

From the Andes to the Coast: Peru’s Hearty Shrimp & Garlic Chowder (Chupe de Camarones)
Ingredients:
Instructions:
1. Make the Shrimp Broth
Peel the shrimp, reserving the heads and shells. Refrigerate the peeled shrimp. In a medium saucepan, add the shrimp heads and shells with 4 cups of water. Bring to a boil, then reduce the heat and simmer for about 20-25 minutes to create a flavorful broth. Strain the broth through a fine-mesh sieve into a bowl, pressing on the solids to extract all the liquid; discard the shells. You should have about 3-4 cups of broth.
2. Sauté the Aromatics
In a large pot or Dutch oven, heat the oil or butter over medium heat. Add the chopped onion and minced garlic and cook, stirring frequently, until the onion is soft and translucent, about 5-7 minutes. Stir in the aji panca and aji amarillo pastes and cook for another 2 minutes until fragrant.
3. Build the Chowder
Pour the reserved shrimp broth into the pot along with the remaining 4 cups of water. Bring to a boil. Stir in the rice, potato chunks, and corn rounds. Reduce the heat, cover, and simmer for about 15-20 minutes, or until the potatoes and rice are tender.
4. Combine and Finish
Add the peeled shrimp, peas, and diced queso fresco to the pot. Cook for 3-4 minutes, until the shrimp turn pink and opaque. Be careful not to overcook the shrimp. Reduce the heat to low and stir in the evaporated milk and dried oregano. Taste and adjust seasoning with salt and pepper.
5. Poach the Eggs
Carefully crack the eggs one by one into the simmering soup, spacing them apart. Let them poach gently for about 3-4 minutes, or until the whites are set and the yolks are still runny.
6. Serve
Ladle the hot chupe into large bowls, making sure each serving gets an egg. Garnish with fresh cilantro or parsley if desired and serve immediately with crusty bread for dipping.
Discover the ultimate comfort food from Peru, a rich and garlicky shrimp chowder called Chupe de Camarones. This one-pot wonder combines fresh shrimp, hearty vegetables, and a creamy, spicy broth for an unforgettable culinary experience.
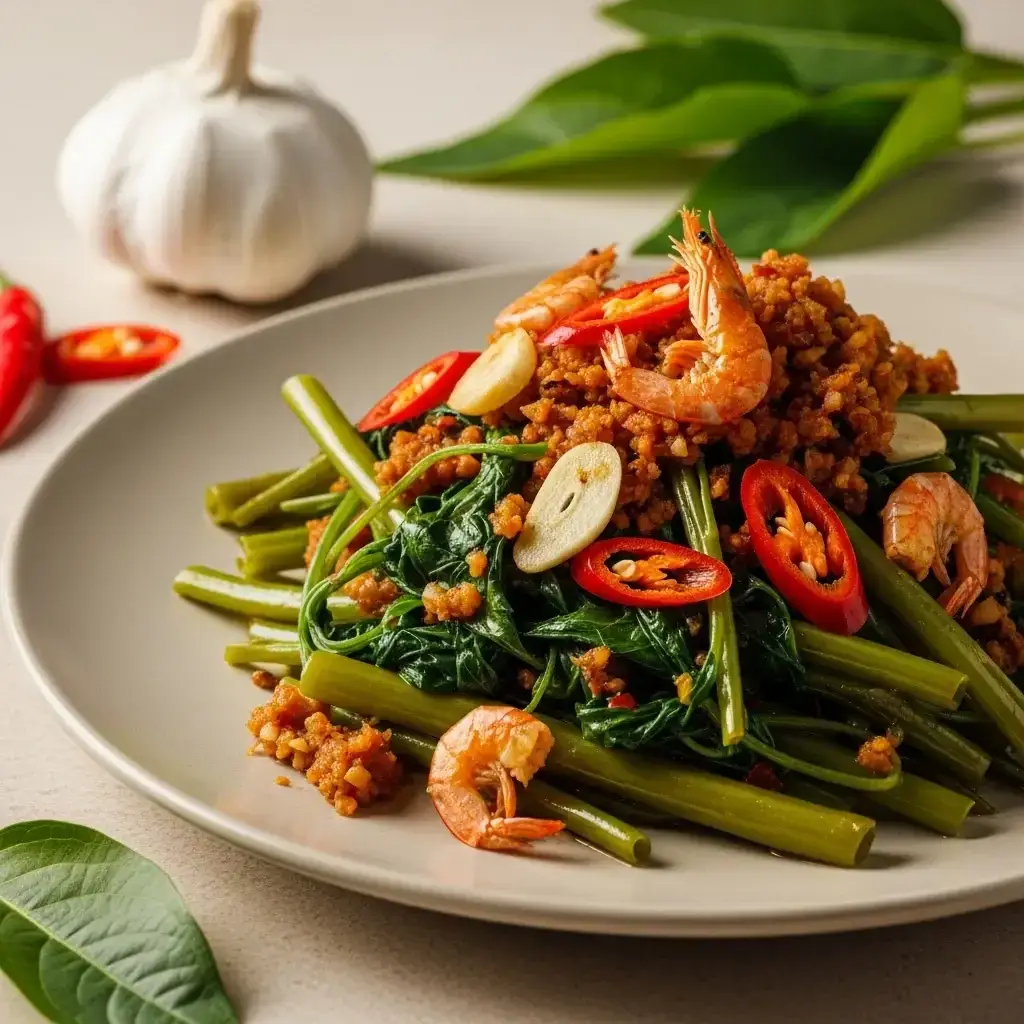
A Taste of the Tropics: Malaysian Garlic & Shrimp Paste Water Spinach (Kangkung Goreng Belacan)
Ingredients:
Instructions:
1. Prepare The Spice Paste By Combining The Garlic
First, prepare the spice paste by combining the garlic, shallots, chilies, drained dried shrimp (if using), and toasted belacan in a mortar and pestle and pounding to a coarse paste; alternatively, you can use a blender with a little water.
2. Heat The Vegetable Oil In A Large Wok
Next, heat the vegetable oil in a large wok or skillet over high heat.
3. Add The Spice Paste
Add the spice paste and stir-fry for a minute or two until it is deeply fragrant.
4. Add The Hardier Stem Portions Of The Water Spinach
Add the hardier stem portions of the water spinach first and toss for about 30 seconds, then add the leafy portions.
5. Stir
Continue to stir-fry vigorously for another 1-2 minutes until the leaves have just wilted but the stems remain crunchy.
6. Season With A Pinch Of Salt And Sugar
Season with a pinch of salt and sugar to taste, toss everything together one last time, and transfer to a serving plate.
7. Serve Immediately With Steamed Rice To Enjoy The Classic
Serve immediately with steamed rice to enjoy the classic Malaysian experience.
Dive into one of Malaysia's most beloved vegetable dishes! This quick and easy Kangkung Goreng Belacan recipe delivers a powerful punch of garlic and savory shrimp paste, creating a side dish that's bursting with authentic Southeast Asian flavor.
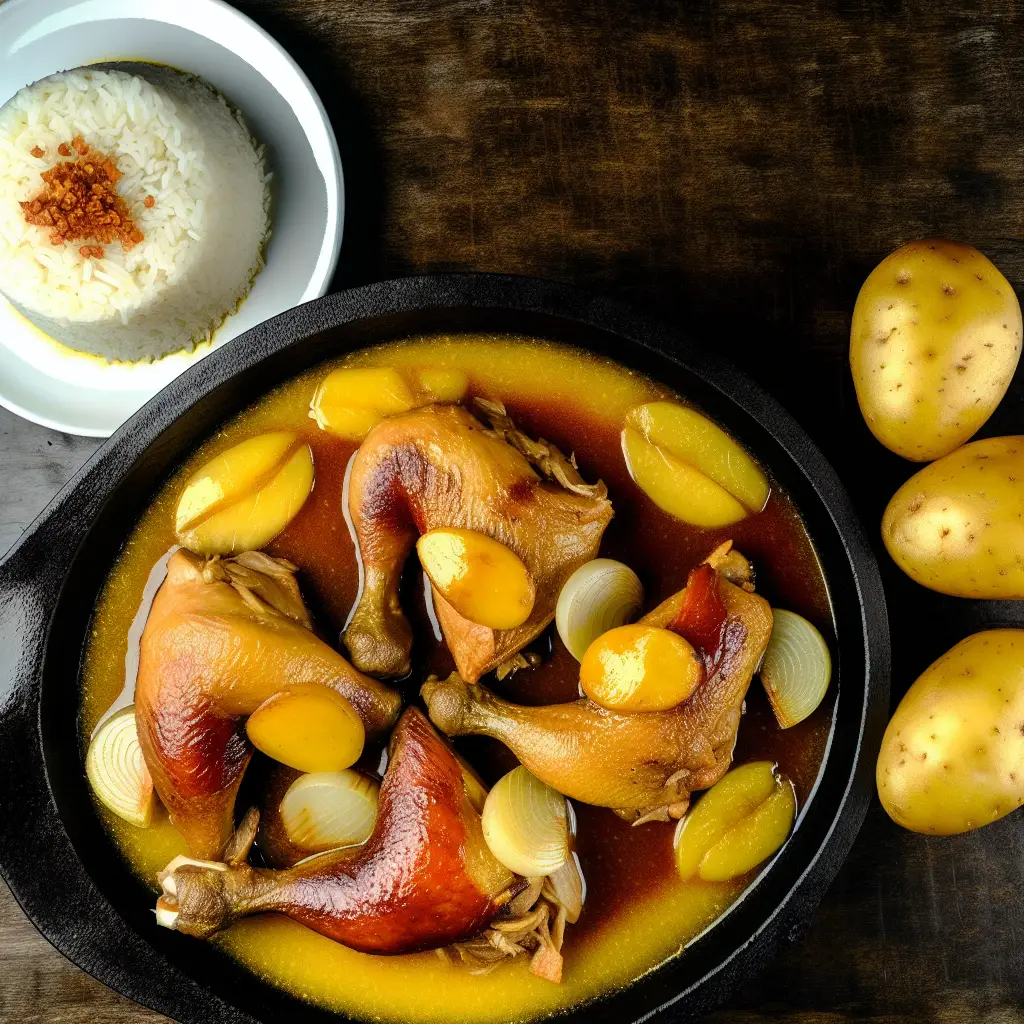
A Peruvian Twist on a Classic: Garlicky Chile Chicken (Pollo al Ajillo)
Ingredients:
Instructions:
1. Prepare the Chicken
Pat the chicken pieces completely dry with paper towels. Season them generously on all sides with salt and pepper.
2. Brown the Chicken
Heat the vegetable oil in a large, heavy-bottomed skillet or Dutch oven over medium-high heat. Carefully place the chicken pieces in the pan, skin-side down. Sear the chicken for about 5-7 minutes per side, until the skin is golden brown and crispy. Do this in batches if necessary to avoid overcrowding the pan. Once browned, transfer the chicken to a plate and set aside.
3. Sauté the Aromatics
Reduce the heat to medium-low. In the same skillet, add the sliced garlic and cook, stirring constantly, for about 1-2 minutes until fragrant and lightly golden. Be careful not to burn the garlic. Add the chopped red onion and cook until softened, about 5 minutes.
4. Build the Sauce
Stir in the aji panca and aji amarillo pastes and cook for another minute until fragrant. Sprinkle the flour over the mixture and cook for one minute more, stirring constantly to form a paste.
5. Deglaze and Simmer
Pour in the white wine to deglaze the pan, scraping up any browned bits from the bottom. Let the wine bubble and reduce by about half. Stir in the chicken broth and bring the sauce to a gentle simmer.
6. Finish the Dish
Return the seared chicken pieces to the skillet, nestling them into the sauce. Reduce the heat to low, cover the pan, and let it simmer for 15-20 minutes, or until the chicken is cooked through and the juices run clear.
7. Serve
Stir the butter and fresh parsley into the sauce until the butter has melted. Serve the chicken immediately, spooning a generous amount of the garlic-chile sauce over the top. It is traditionally accompanied by white rice and potatoes.
Garlic and chile join forces in this vibrant Peruvian chicken dish.
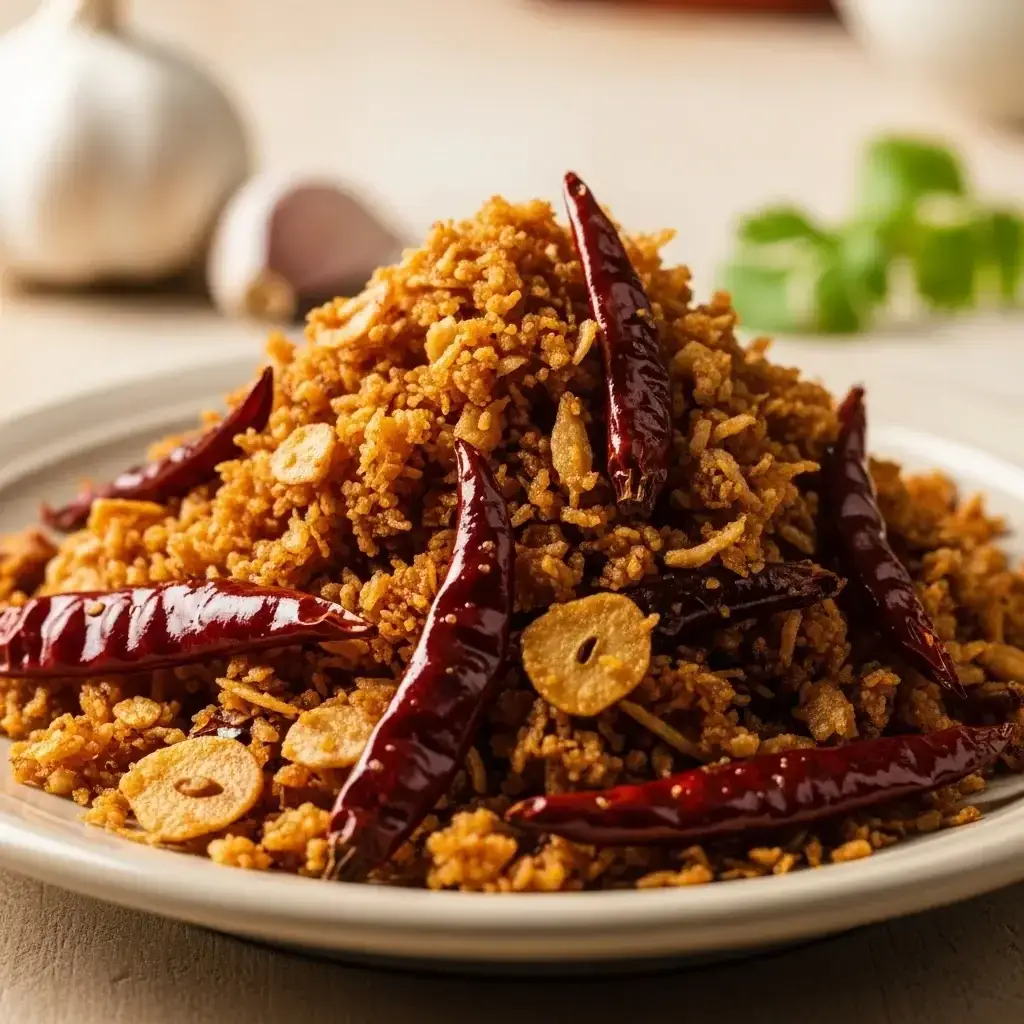
Thailand’s Pantry Staple: A Fiery Fried Garlic & Chili Relish (Nam Phrik Kratiem)
Ingredients:
Instructions:
1. Prepare the Aromatics
Begin by thinly slicing the peeled garlic cloves. For the dried chilies, snip them into small pieces, shaking out and discarding as many seeds as possible to control the heat.
2. Fry the Garlic
In a small saucepan or wok, heat the vegetable oil over medium heat. Add the sliced garlic and fry, stirring constantly, until it turns a beautiful golden brown and becomes crispy. Be very watchful as it can burn quickly. Using a slotted spoon, remove the fried garlic from the oil and set it on a paper towel to drain. Reserve the garlic-infused oil.
3. Toast the Chilies
In the same oil, add the dried chili pieces. Fry for just 30-60 seconds until they darken slightly and become fragrant. Remove them promptly with the slotted spoon and drain on a paper towel.
4. Combine and Pound
Allow the fried garlic and chilies to cool completely. Once cooled, place them in a stone mortar and pestle along with the salt and sugar. Pound the ingredients together into a coarse, flaky relish. You can also use a food processor and pulse carefully to achieve a similar texture, but avoid turning it into a fine powder.
5. Store
Transfer the finished Nam Phrik Kratiem to a clean, airtight jar. It can be stored at room temperature for several weeks, ready to add a punch of flavor to your favorite dishes.
A spoonful of this will transport you straight to a bustling Thai market. This Northern Thai-style relish, known as *Nam Phrik Kratiem*, is a deliciously rustic and versatile condiment that will elevate any meal. Unlike the fresh, liquid dipping sauces, this is a "Nam Phrik Haeng" (dry chili relish) built on the deeply aromatic and savory flavors of fried garlic and toasted chilies. It’s an incredibly simple recipe with a surprisingly complex taste that's spicy, savory, and utterly addictive. Perfect for sprinkling over rice, noodles, soups, or grilled meats, this fiery garlic relish is a true pantry hero.
Chesapeake Bay’s Best: A Creamy, Cheesy Garlic & Crab Dip
Ingredients:
Instructions:
1. Preheat and Prep
Preheat your oven to 375°F (190°C). Lightly grease a 9-inch pie plate or a similar-sized oven-safe baking dish.
2. Mix the Base
In a large mixing bowl, use a hand mixer or a sturdy spatula to beat the softened cream cheese until smooth. Add the mayonnaise, sour cream, minced garlic, Worcestershire sauce, lemon juice, hot sauce, and Old Bay seasoning. Mix until everything is well combined and creamy.
3. Add Cheese and Crab
Stir in half of the shredded cheddar and all of the Colby Jack cheese (if using). Add the chopped chives. Gently fold in the lump crab meat with a rubber spatula, being careful not to break up the chunks of crab too much.
4. Bake
Transfer the mixture into your prepared baking dish and spread it evenly. Sprinkle the remaining shredded cheddar cheese over the top. Bake for 20-25 minutes, or until the dip is hot and bubbly and the cheese on top is melted and lightly golden.
5. Broil and Rest (Optional)
For a browner, more bubbly top, switch the oven to a broil setting for the last 2-3 minutes of cooking, watching carefully to prevent burning.
6. Serve
Let the dip cool for at least 10 minutes before serving. This allows it to set up slightly. Garnish with extra fresh chives and serve hot with your choice of crackers, bread, or veggies for dipping.
A bubbling, cheesy dip loaded with crab and a serious garlic punch.